The first thing you should do when you buy a bike is to ensure the bike you just bought is of the right size for you because no adjustments can be done to fit a bike whose size is not at all suitable for the rider, i.e. too small or too large.
The second step is to correctly set it up. Having the proper bike size is emphasized because this will allow you to generate the most power and efficiency, so actually making it easier to bike.
Also, a properly fitted bike ensures that the rider is not overworked which is caused by an inappropriate angle and position. The accurate position differs from person to person depending on their age, height, style of riding, and flexibility.
By following a few adjustments, you can fit your bike to an ideal position!
9 Adjustments To Perfectly Setup Your Bike
1. Saddle Height:
To gain the most efficiency out of pedaling is to first make the adjustments to the saddle (seat) height accurately.
Correct saddle height can make an immense difference to the bike performance. A quite simple procedure to find out the exact height you need is:
1. Put both heels on the pedal while sitting on the saddle
2. Now just turn over the pedal to its full extension.
3. The perfect saddle height is when each leg straightens completely as the pedal reaches the bottom.
4. Your hips should always be at the same level as the saddle.
5. If the saddle is set on the higher side then legs will have to overwork due to overextension and could lead to knee, hip, and ankle injuries.

2. Saddle Setback:
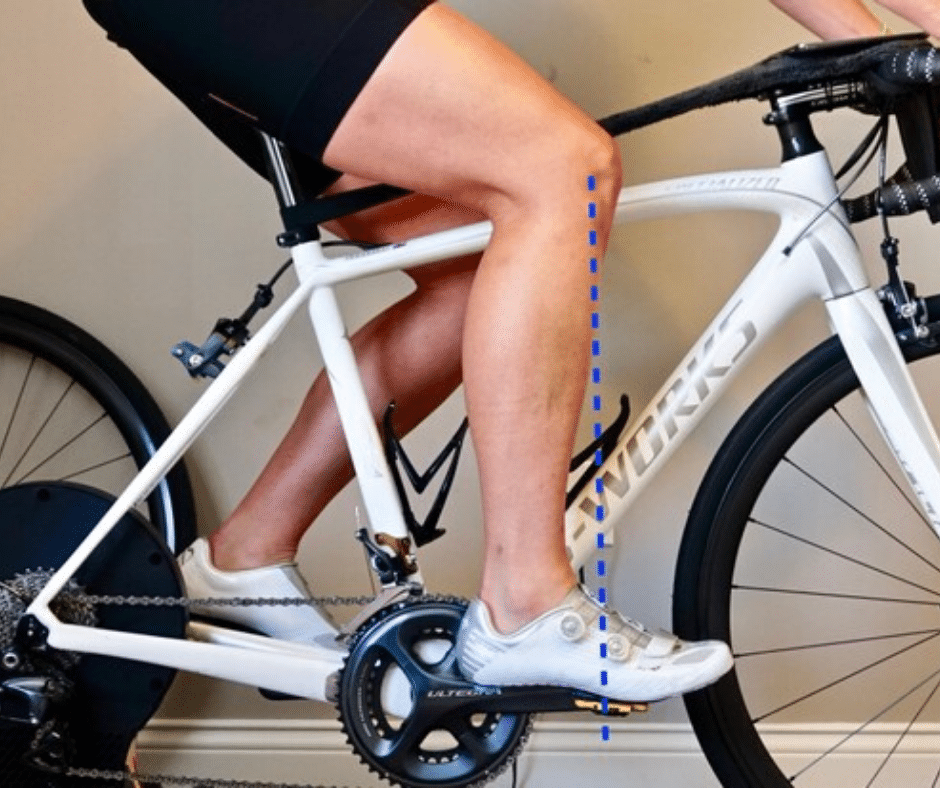
1. Start adjusting by aligning the knee with the pedal axle first at 3 o’clock and then 9 o’clock position.
2. Drop a plumb line (a string with something heavy on the end of it) in front of the kneecap.
3. Identify the point when the plumb line drops just in front of the pedal axle in the 3 o’clock position.
4. Now you can make small changes by moving backward or forward to increase overall comfort in the desired style of riding.

3. Handlebar Height And Its Reach:
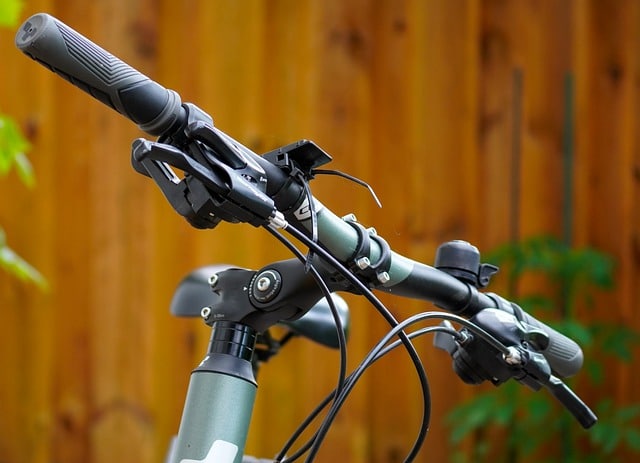
Handlebars play a crucial role in defining how far you will be reaching forward. Accurately positioned handlebars are important for your comfort and a key factor in controlling steering and brakes.
When the height is right it allows you to lean forward smoothly without exerting any tension on the back, neck or wrists and it will enable you to comfortably reach the tops & brake on a road bike and grips on a mountain bike.
1. Adjust the height by simply loosening the stem bolts and moving the spacers to change the stem position.
2. Start with positioning the handlebars at the same height as your saddle.
3. Raise the bars if you want a head-up position
4. Lower the bars if you want head-down riding position.
5. Refit the stem and tighten the stem top cap and finally tighten the stem steerer bolts.
Most importantly, ensure that you can comfortably reach the brake levers once the height is adjusted.
4. Stem Length And Its Direction:
While adjusting the height of handlebars, you can set the stem length as well. It is really important to calibrate the stem length because if it’s too long it will cause your body to overstretch and if it’s too short it will result in body strain. In both cases, there will be a lot of irritation and discomfort that will eventually ruin the whole bike riding experience.
Moreover, ensure that the stem is straightly aligned with the front wheel, it may require a lot of calmness and tolerance to secure the stem in a perfectly straight position.
5. Set The Cleats:
6. Tire Pressure:
Correct tire pressure plays a vital role in bike performance. If it’s too low it will lower down the pace, if it’s too high it will result in the strident ride. Optimum tire pressure varies on a couple of factors like depending on your weight and road condition.
Find out the perfect tire pressure for your bike by checking the side of your bike tire. There will be a recommended PSI.
You can also test and experiment. There is no harm in riding within a range of 5 to 10 psi from the usual tire pressure i.e. 120 psi.
TIP: buy a pressure gauge to attain accuracy in measurements.
7. Examine Quick Release:
8. Fine Tune The Basic Bike Fit:
If you feel any discomfort, follow the below-mentioned adjustments in response to specified symptoms:
Sore neck or back pain:
The front part of the knee:
Back part of the knee:
Pain on the outside of the knee:
Hip pain:
Sore hamstring
9. Adjust Brake/Gear Levers:
1. Carefully inspect brake and gear levers, they shouldn’t be too tight.
2. In case of any mishap, you should be able to rotate them smoothly.
3. The most suitable position of the brake lever is where the fingers reach the last inch.
4. After the brake lever, position the gear lever in the same manner. Both brake and gear lever should be comfortably reachable during a ride.

Final Assessment:
Always begin examining the settings from a neutral position. You should have a restful grip on the handlebars so that your head remains in an upright position otherwise your back will get tired soon and your neck will get stiff. While you hold the handlebars your shoulders should drawback, away from the ears and your elbows must have a soft bend to stay relaxed.
Check that your body weight is born by your legs and your knees are not close to the bars.
The foot should always be at an angle on the pedal it should never be completely horizontal. Ensure that length of your head stem is appropriate, it depends on how low you want to sit.
The other much simpler way is to opt for “THE M CHECK” method which only takes 5 mins to examine all the main checkpoints by following the pattern letter M methodically.
For better understanding of the procedure go through the article on bike riding safety.
Once you feel completely comfortable on your bike you are ready to ride. Do a little warm-up exercise to before hitting the road. If you sense that additional adjustments are required don’t be hesitant to ask for professional help especially new riders are suggested to ask for assistance from an expert. Give us a call at (613) 236-9611 to book an appointment to get your bike adjusted!
